
Diagnosing and Clearing the Clog That Causes Slow Drying Times
The Real Reason Your Dryer is Slow
It’s a common and frustrating experience: you run a full dryer cycle, only to find your clothes are still damp. Your first thought might be that you have a complex and expensive problem, but a slow dryer is rarely caused by a broken heater. The true and most common culprit is something much simpler, yet more serious: severely restricted airflow in the venting system. This issue is not just an inconvenience that wastes your time and energy; it is also a serious potential fire hazard. This guide will provide a clear, step-by-step tutorial to restore fast, efficient drying, starting with the easiest fixes first.
Step 1: The 5-Minute Diagnosis (Check Airflow Basics)
These initial checks are the simplest to perform and can often solve the problem in just a few minutes without any special tools.
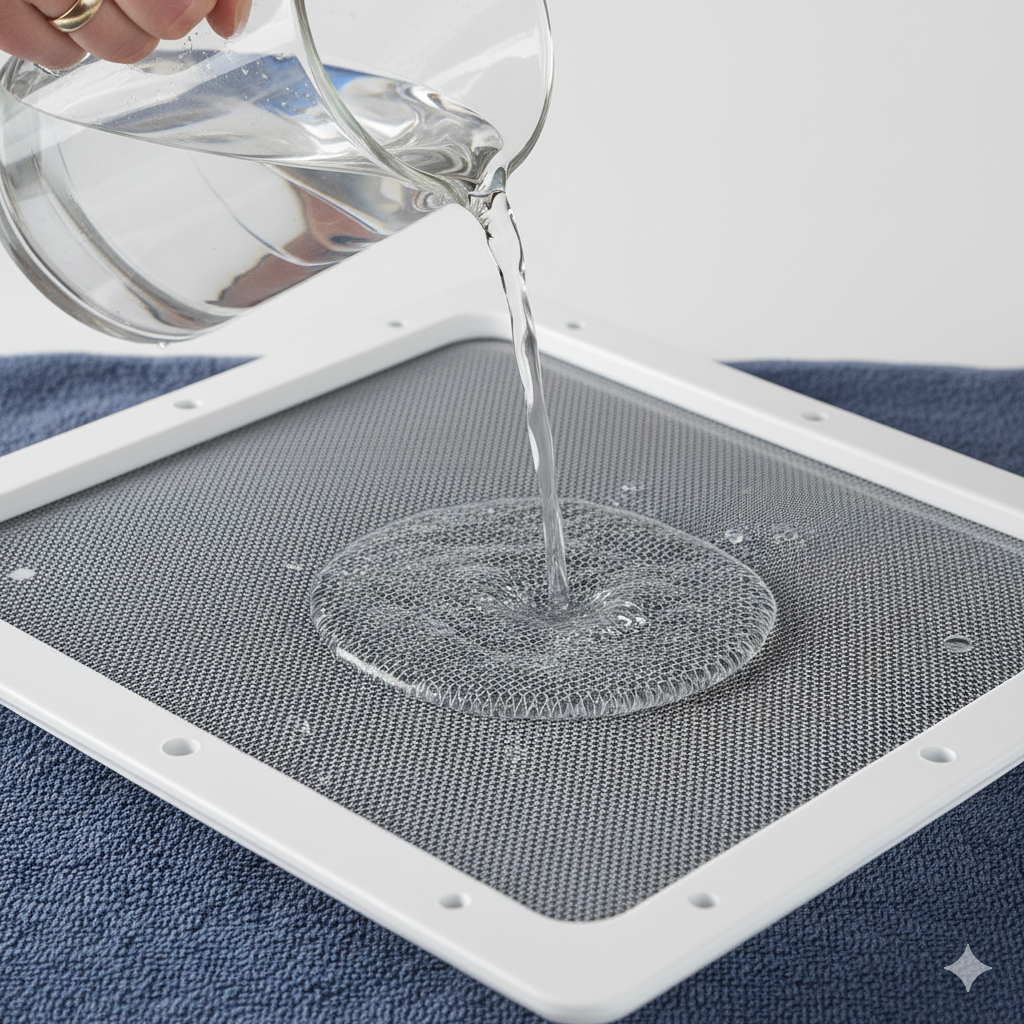
Even after cleaning, test your lint screen. If water pools, a film from dryer sheets or fabric softeners is restricting vital airflow.
1. Inspect the Lint Screen
- Action: It is critical to thoroughly clean the lint screen before every single load.
- The “Invisible Clog” Test: Even a screen that looks clean can be clogged. Fabric softeners and dryer sheets can leave an invisible film that blocks air. To check for this, run water over the screen. If water beads up or pools on the surface instead of flowing through, it’s clogged.
- The Fix: Gently scrub the screen with a soft brush, warm water, and a touch of detergent to remove the film and restore airflow.
2. Check the Exterior Vent Hood
- Action: While the dryer is running, go outside to where the vent exits your home.
- What to Look For: A healthy dryer will produce a “strong blast of hot, moist air” from the vent, and the exterior vent hood flap should be pushed fully open by the force of the air.
- The Diagnosis: If the flap is closed, barely moving, or the airflow feels weak, there is a major blockage somewhere in the vent line that you must clear.
If you have diagnosed a major blockage based on the vent hood test, it’s time to clean the entire vent line.
Step 2: The Fire Hazard Fix (Clear the Main Dryer Vent Line)
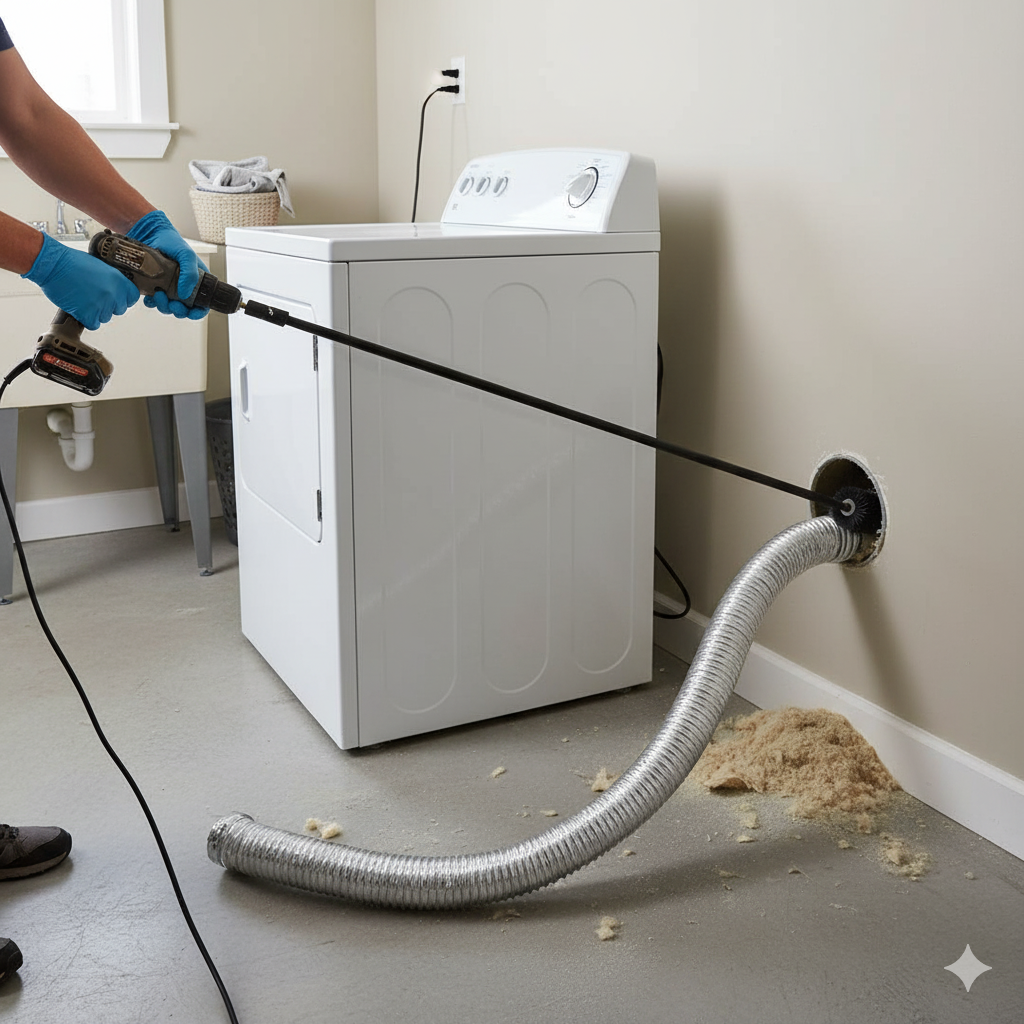
Use a specialized brush kit to deep-clean the entire vent line running through your walls. Removing this lint is critical to preventing a fire hazard.
The vent line is the most common place for lint to accumulate. This buildup leads to poor performance and creates a significant risk of fire.
- Safety First Before you begin, unplug the dryer from the wall outlet. This is the most important step for your safety.
- Access the Vent Disconnect the vent hose from the back of the dryer. Carefully pull the appliance away from the wall to give yourself room to work.
- Clean the Transition Hose This is the flexible hose that connects the dryer to the wall vent. Check it for lint buildup and ensure it is not crushed or kinked behind the appliance. For best performance, the hose should follow the shortest, straightest path possible.
- Deep Clean the Wall Vent Use a specialized dryer vent cleaning brush kit or a leaf blower from the outside to thoroughly clear the entire rigid duct running through your walls. If using a brush kit, push the brush through the duct from the dryer’s connection point until you have cleared the entire line to the outside hood.
A Critical Warning About Your Ductwork Material Rigid metal ductwork is the safest option for your home. If you discover flexible plastic ductwork, it may need to be replaced. It is a known fire risk because lint easily catches on its ridges, increasing the chance of a dangerous blockage.
If the vent is confirmed to be completely clear but the problem persists, you may need to investigate the dryer’s internal components.
Step 3: Advanced Fixes (Testing Internal Components)
These steps should only be attempted after you have confirmed that the entire venting system—from the lint screen to the exterior hood—is completely free of obstructions.
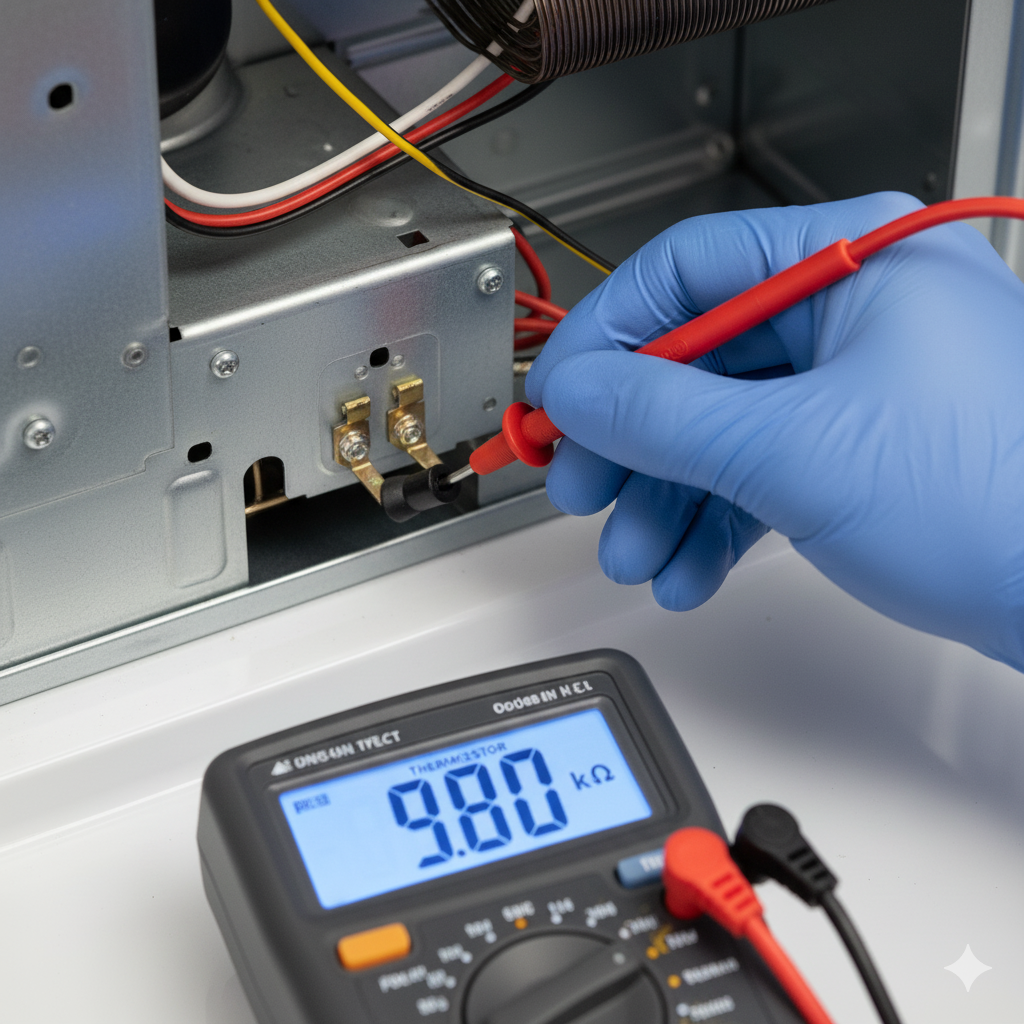
If the vent is clear, use a multimeter to test the thermistor. If it reads infinity or zero, the faulty sensor is shutting off the heat prematurely.
| Component (Function) | Common Location | Symptom of Failure | How to Test (Dryer UNPLUGGED) |
| Thermistor (Temperature Sensor) | In the blower housing or near the exhaust duct. | Dryer shuts off the heat prematurely. | Use a multimeter to test resistance. A good part reads around 10,000 Ω (10k ohms). A reading of infinity or zero means it’s faulty. |
| Cycling Thermostat (Temperature Regulator) | Mounted on the heating element housing. | Dryer cuts off the heat too soon. | Use a multimeter to test for continuity. It should show continuity at room temp. A reading of O.L. (open loop) means it’s faulty. |
| Heating Element (Electric Dryers Only) | Inside the heating element assembly. | Dryer heats very slowly, but isn’t completely cold. | Use a multimeter to test resistance. A good part reads between 10 Ω and 15 Ω (ohms). A much higher reading suggests a partial failure. |
If you are not comfortable performing these tests, or if they do not solve the problem, it is time to consider professional help.
Conclusion: Airflow is Everything
This tutorial’s main insight is that unobstructed airflow is the single most critical factor for an efficient and safe clothes dryer. Following these steps can restore your appliance’s performance, lower your energy bills, and protect your home, but you must always remember: “Restricted airflow is dangerous.” If you cannot safely and completely clear your vent line or you are uncomfortable testing internal electrical components with a multimeter, it is best to call a qualified appliance repair expert.
Now that you know the risks, when was the last time you checked what’s inside your dryer vent?
Need expert service for slow-drying problems or vent cleaning in the Miami area?
Restricted airflow is dangerous. If you cannot safely clear your vent line or need help testing internal electrical components like the thermistor and cycling thermostat, our certified technicians are ready to provide fast, reliable appliance repair.
Dade County Community Service Area:
| Aventura | Cutler Bay | Kendall | Miami Springs |
| Biscayne | Doral | Miami Beach | North Miami |
| Coconut Grove | Hialeah | Miami Gardens | Palmetto Bay |
| Coral Gables | Homestead | Miami Lakes | Pinecrest |
| South Miami | Sunny Isles |